In my office, I had two small bookshelves that are from my childhood room. When we moved into our house I put a coat of white paint and overloaded them with our book collection and called it finished. Over the last two years, more stacks of books and boxes have been placed on top and next to them waiting for the day that I upgrade to bigger bookcases.
It was such a mess!
I am finally making that upgrade! Although I had been eyeing the large Ikea Expedit Shelving Unit and the medium Ikea Expedit Shelving Unit for a while now, it is not in our budget to spend almost $300 on both of them. But even without my ideal bookcases, my bookcase dreams are becoming a reality
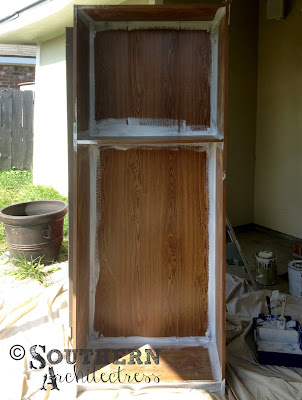
Two free bookcases my Mama handed down to me was a major score! While it is not exactly the look I want, it will definitely function by getting all the stuff overflowing from the existing bookshelves off the floor. I decided to revamp them because I wasn't digging the wood laminate look. I have panted pieces before (the current bookshelves, a side table, and a headboard), but this would be my biggest project so far.
First, Mr. Engineer sanded all the surfaces with a hand sander.
We use 220 grit sand paper. Just to remove all imperfections and gently rough up the surface.
The next step was to prime and paint the wood laminate. I used primer and paint. I picked a white paint to match the moulding in our house. I just brought a paint chip to Lowes and they matched the color.
First I cut in all the corners and hard to reach areas with a small brush.
Then I painted a second coat of primer to get better coverage.
While the primer was drying, I started the role process over on the shelves by sanding...
Then priming…
And finally painting them.
Then, took the existing bookshelves and books out of the office to make room for the new bookcases. Here is the blank slate room.
Finally, I painted all the surfaces of the main bookcase with white paint and brought the new bookcases into the office.

My next step was to line the back of the bookcases with fabric. (This idea is all over pinterest)
So I cut some chip board to size that would fit.
The fabric I decided to use is Amy Butler Midwest Modern Fresh Poppies in Fuchsia.
I used some scissors to cut out the fabric and some spray adhesive to mount the fabric onto the pre cut chip board pieces.
I then mounted those fabric boards in the back of the bookcase using spray adhesive.
I then reassembled the shelves into the bookcase which will further secure the fabric boards in.
I have plenty of room for more books and new items now! I thought about maybe adding some dividers to get the look of the Ikea Expedit bookcases, but for now I am looking for a few bookends to get the job done. Although, I still have my eye on the two Ikea Expedit bookcases, for now my reading nook is a reality with the free bookcases that I revamped! I still have put back the books and items and stylizing it, which is the fun part!
And don't worry, I'm not getting rid of the previous bookshelves, I have another project in mind for them!
Linked up to Blissful and Domestic
Linked up to The Turquoise Home
Linked up to East Coast Creative
Linked up to Not Just a Housewife
Linked up to Blissful and Domestic
Linked up to The Turquoise Home
Linked up to East Coast Creative
Linked up to Not Just a Housewife


I want them back now ! I think Annette is ready to come home.
ReplyDeleteSo beautiful! (You're right -- that fabric is SUPER close to the wallpaper I liked. Thank you so much for sending the link!) The bookcases look amazing!
ReplyDeleteKelly @ View Along the Way
Southern ArchitectressJanuary 31, 2014 at 7:38 AM
DeleteThanks! When I was researching whether to line the back with wallpaper or fabric, I found fabric was cheaper, and I just fell in love with this print! I am not sure if if will work with your project, but I wanted to throw out another option for you to consider using fabric. Maybe doing panels, like a headboard?