Saturday, August 16, 2014

Baby Shower Plaque

A couple years ago was wedding season and it seemed like Mr. Engineer and I were going to a wedding every weekend... Now it is officially baby season with all of our newly married friends becoming new parents. Last week, I went to a baby shower for a family friend. She is having a sweet baby boy.


This is the plaque I created! I like to make something to give as a gift because it is more personal than buying something.

I am going to go through step by step instructions if anyone wants to do this plaque project!

Supplies for this project:


- paint (I just used some paint I already had -for the background I used Ultra White - 70143 Valspar interior semi-gloss paint, for the lettering I used La Fonda Artisan Green - 5009-7 Valspar interior flat paint and Navy Blue - 403 FolkArt matte acrylic paint and for the outline I used Metallic Silver Sterling - 4034 FolkArt enamel acrylic paint
- pencil (to outline the image or words)
- paint brushes of various sizes
- wood plaque (this is the only supply I bought, I picked mine up at Michael's)


The plaque I used was already primed with white, so I only had to do one coat of white paint.


Then, I outlined my lettering.


Next, I painted the lettering in the green and blue.


Finally, I added the silver accents.


I even added some color on the edges.


I also wanted to share a different plaque I made for another family friend:

She had a little girl.


All I did was change the colors and font...


...so it would match the color of the nursery décor.

Thursday, July 3, 2014

Fourth of July Burlap Flag Wreath

To celebrate Fourth of July, I wanted to share the burlap flag wreath that I made.


I wrapped red chevron burlap and blue star burlap and added a couple flags...


... and I used a hot glue gun to put it all together.


I hope everyone has a happy time memorializing the anniversary of the Decoration of Independence. Mr. Engineer and I will be heading to the camp for the weekend for plenty of fun in the sun.


Linked up to My Repurposed Life

Monday, June 30, 2014

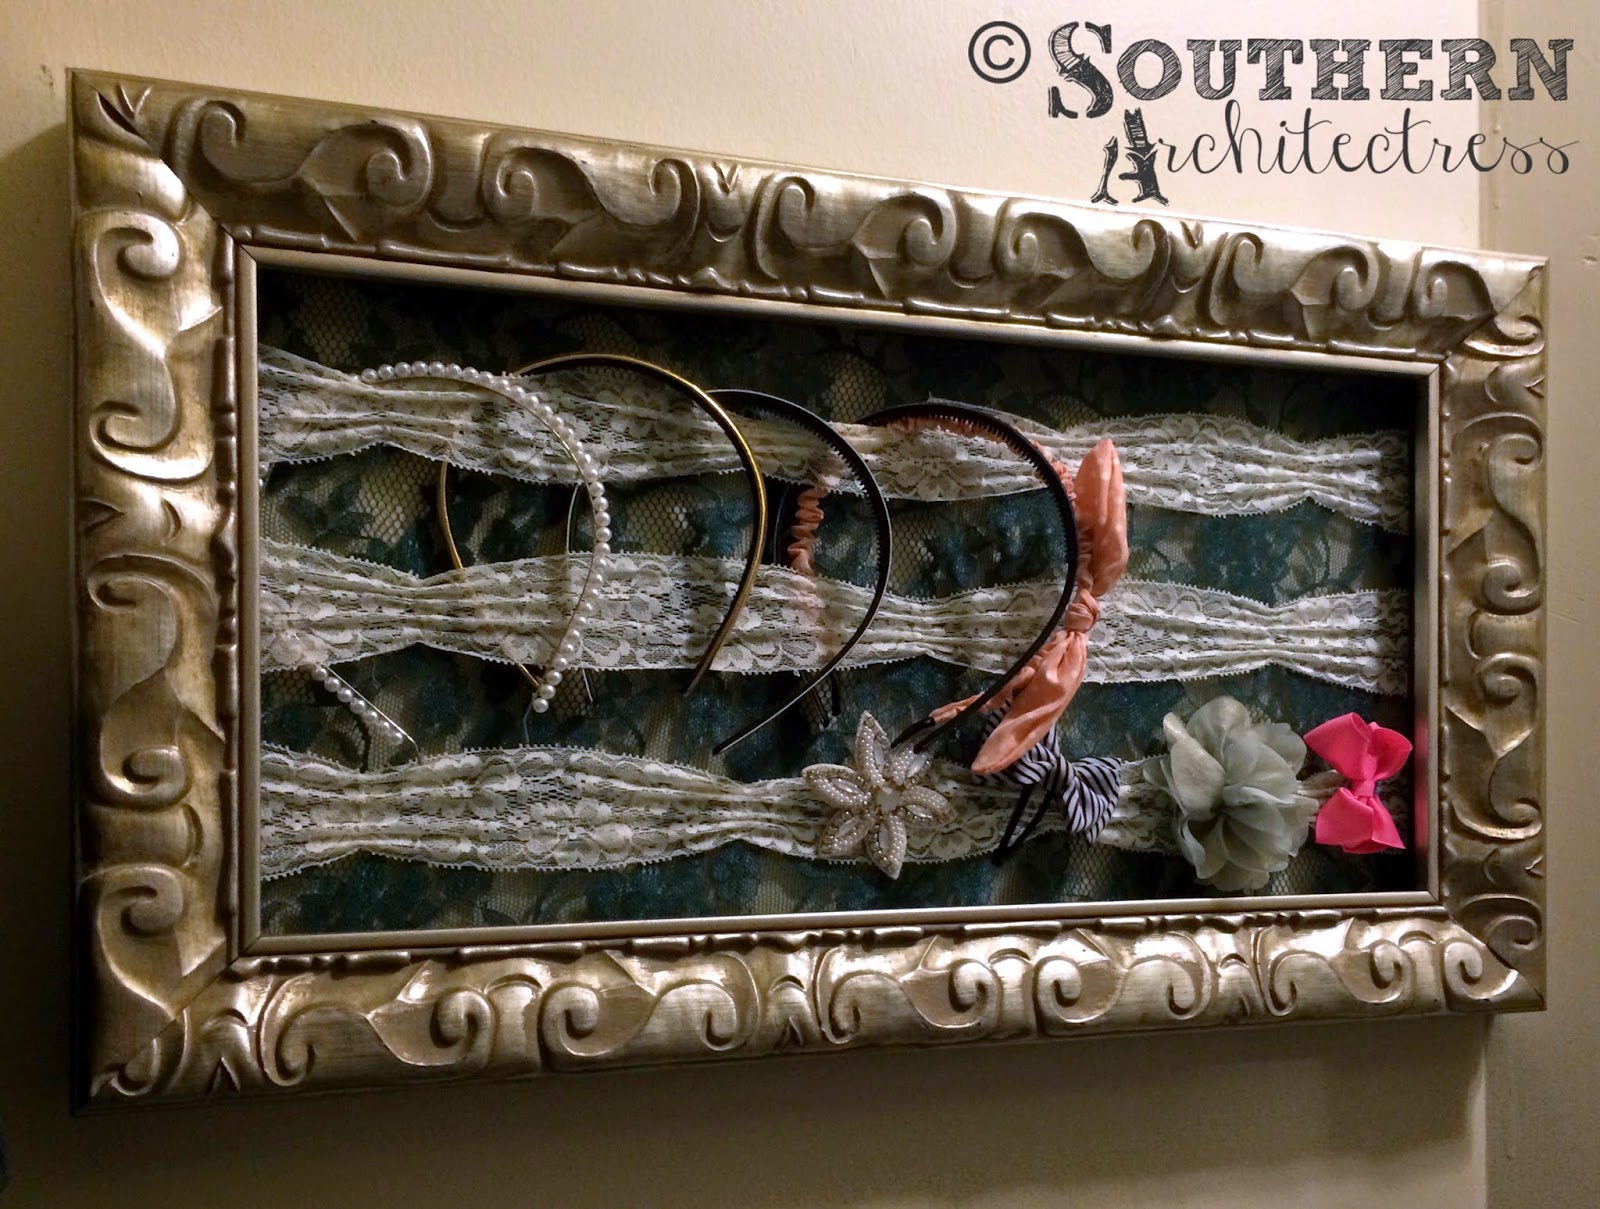
Lace Frame Accessory Holder

I love to use accessories for my hair because I hate it in my face, so you will usually find me with a headband or clip in my hair. I was using a shelf divider and a couple of shoe boxes to currently house these items. The organization of these accessories has become unruly in my closet. 


It is so messy and makes finding anything a chore. I needed a new solution, so I came up with a plan...


 ...a Lace Frame Accessory Holder. I was inspired by this. This allows me to easily see everything and to have a pretty display that I can choose from.


 I started with this open frame that was on sale at Hobby Lobby.


Supplies for this project:


- open frame
- staple gun and staples
- various lace (I used a yard of emerald lace I already had and bought some stretchy ivory lace ribbon)
- scissors
- needle and thread


 First I cut three pieces of the ivory lace ribbon.


Then I stapled the first piece to the back of the frame.


 Then I stapled the other two pieces.


 Here you can see the detail of the double row staples, so I could make sure it wouldn't break when that piece was streached.


 Next, I cut down a piece of the emerald lace.


Then, I attached a lace panel to the back with more nail gun action.


After I stapled all four sides, I trimmed off the excess.


Here you can see the detail of the staples on the back.


I wanted to make the three lace ribbon on the front more secure, so I hand sewed areas so that the lace ribbon could stay in place and not sag due to the weight of the items I place on it.


I stitched the first ivory lace ribbon to the emerald lace panel.


Then I stitched the other two ribbon.


Now the fun part was going through my collection and picking a spot for each accessory.  It really also allowed me to clean out stuff that I don't need anymore.


I added hangers to the back and mounted it on the wall in my closet.


It fits perfectly.


Voila! All my pretty hair things displayed!


Linked up to I Heart Organizing

Linked up to The Turquoise Home

Linked up to Not Just A Housewife

Sunday, June 15, 2014

Architectural Charcoal Rendering - Mount Carmel Academy

I was commissioned by my almer mater for some artwork of Mt. Carmel Academy for an auction. I was super excited at the chance to give back to my high school.

 Here are a couple photos of the building:

Photograph by scrambler390


 This is Mount Carmel Academy located on the corner of Duperior Avenue and Front Street in New Iberia, Louisiana. It is a beautiful building sited on the Bayou Tech. I was familiar with the history, but I learned some new thing about it's past when I did some research. It was constructed in 1850 as a residence for Doctor Henry Duperier. In 1872 it was sold to the Sisters of Mount Carmel and became a Catholic boarding school. The school was closed in 1988 when it joined with St. Peter's College to become Catholic High School of New Iberia, where I went to elementary and high school. Today it is the Place Eugenie office building owned by the Schellestede family.

After getting a feel for the building's history I got started on the rendering:


I choose 17" x 14" 80lb drawing paper.

 I started by taping off the area I want to work within. I used the dimension of 11" x 14" which is a typical size that can be easily matted and framed.


 Next I used vine charcoal and a ruler to do a basic perspective. I choose the view looking directly at the front facade.


 Then, I added more detail with the vine charcoal.


 Next, I picked up some black conte' and started retracing lines and adding more detail.


 Then, I wanted to add some color to give more life to the building. So, I picked up some brown conte' and started adding texture to the roof, shutters, and lentils.


 Next, I used white conte and more black conte to give some more contrast and add texture.


 Finally, I added in the final touches of the vegetation, oaks, sky and grass.

 My favorite part is peeling back the tape to reveal the crisp border line.  I love the way it turned out!


Here you can see more detail and the title of the artwork above my signature.


Linked up to Not Just A Housewife

Linked up to The Turquoise Home


Saturday, June 7, 2014

DIY Cake Plate

I have been on the hunt for the perfect cake plate, but they are either too plain or too expensive.


I got the idea of making my own cake plate.


The plan was set to action when I happened upon the perfect base for it at Hobby Lobby. It was a candle holder... Now all I needed was a plate.

I also found these found plates at Hobby Lobby and these and they were only $2.
  

 The only tools I needed to complete the project were a can of spray paint and a hot glue gun.
The bottom of the plate was black, so I sprayed it gold.
Then hot glued the candle holder to the plate.
Voila! My own gold and green cake plate.
It looks even better with a cake on it!
It even looks great with a cake dome.


Linked up to Not Just a Housewife

Linked up to The Turquoise Home

Linked up to It's Always Ruetten